Showing posts with label tutorials. Show all posts

Tuesday, May 6, 2014

The Anti-Tutorial…Opals

So, browsing around Pinterest the other day, and I saw a pin saying "Polymer Clay Opal Technique". Being  me, and loving opals way too much (seriously, my etsy wishlist is full of them) I clicked.
I was horribly disappointed. They looked nothing like opals.*
For the record, here's a few options for opals from around the world. 
Black Opal
White Opal
Boulder Opal
 
Mexican Fire Opal
Sadly nothing I could find looked even remotely like that. I wept! There are no opal tutorials. D: What's a gem loving girl to do? 
And then......
I found this.
Those two examples, look amazing! I especially love the one on the right. 
I couldn't find anything close to those though. :( No one else seems to have figured out their technique.
But I came close with this lovely one.
The bottom one gives me some ideas... although it would mean that I'd have to get liquid polymer clay and sparkly bits somehow... 
* I'm not going to link directly to any of these, because, well, that would be mean. 
What are your thoughts on faux opal techniques? Do you have anything to share? Comment below!


Thursday, March 20, 2014

Pssst! Spring is Here!


SpringTut


Hullo ladies and gents. Guess what today is? The first day of spring! I don't know about anyone else, but I am soooooo ready to put away my winter coat.

I want flowers and green things, and NO MORE SNOW! 

Since I can't exactly request that Mother Nature hurry, I'll do what I can, which is, bringing you a post full of spring themed tutorials! :D

First up, wired flowers, done in the Victorian/French style.

Next up, earrings, you could whip these up in 5 minutes and head out the door to enjoy the sun shine.

Now to go with the earrings, you need a necklace.

or

or

daisy-chain-final

A daisy chain :D

What about some hair pieces?

http://jewelry-crafts.wonderhowto.com/how-to/make-delicate-beaded-hair-vine-for-weddings-375730/

What about if you like clay? Here you go, a basic how to on creating  flower cane.

Butterfly canes?

Flowers aren't the only thing coming out at this time, so what about something different? Birds!

Bird nest jewelry? TBH, I've never heard of it, but it sounds sort of fun.
http://voices.yahoo.com/unique-tips-tricks-steps-making-bird-nest-jewelry-11183060.html?cat=11 
No picture was provided for the one above, so I found  a video as well. Smile 

And to top everything off, Pantone's 'Colors of the Year'

They all look like very springy colors to me this year.
Have a good day everyone, and have fun. I am off to make some beaded flowers. :D

Comment below.


P.S.  Sorry for the lack of posts this week ya’ll. It’s been a very busy week, running hither and yon.

Wednesday, March 12, 2014

Alcohol Ink & Polymer Clay- A Guide-


Alcohol Ink Guide

As I mentioned last week, when I was recounting the perils of polymer clay, I originally started looking at polymer clay specifically for working with alcohol inks. I was first astounded by the lovely Veronika Sturdy over on Flickr with her work. It’s detailed and colorful and leaves me wanting to make LOTS of stuff!

And so I went hunting, to see if I could find out a) How to make my own alcohol ink and b) how to make something so vibrant and beautiful.

The first part was easy enough to find, over at Crafting a Green World, I read the tut, and quickly ran around my home looking for a bag of markers I’d stashed. Et voila! 30 mins later, I had a bunch of alcohol inks. But…. How do you use them?

Well, I found two lovely tutorials.

The first lets you make something like this

Except… you have to have liquid polymer clay. Which I don’t have access to for the time being… Hrm. Back to the internet. Which led to the second one.
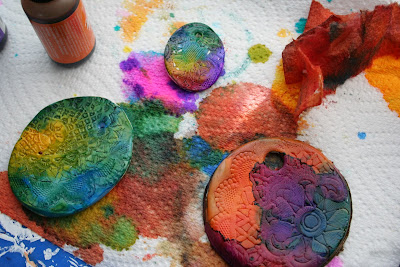
A very lovely tut, easy simple to follow, and best of all, only two things were required, and I had both! Polymer clay and alcohol ink. Open-mouthed smile 

But… It’s not quite as vibrant as the lovely ones that Veronika Sturdy attains…
So I decided to  do tests first.  I had to make sure that it would work.  And that is what this post comes from. My tests of alcohol ink vs polymer clay.

First up, we have Alcohol Ink, painted directly to UNCURED clay.

SAM_0529SAM_0531

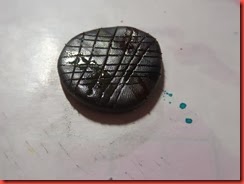
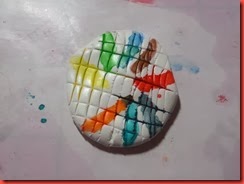
I used the same technique for both the white and the black pieces. Just a simple stripe of the different colors, going around the piece. I tried to make sure they didn’t bleed, but wasn’t 100% successful.

SAM_0532ISAM_0533

The row below is the pieces after they were baked. The colors of the inks became a little bit lighter, but not by much. The black has an iridescent look to it, which is hard to see unless you get the angle just right, and even harder to capture on camera.
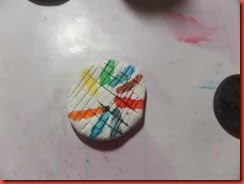
SAM_0534SAM_0535

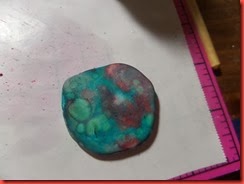
These next three photos are tests of CURED clay that was then painted. (The black ink didn’t change a bit, and I decided not to waste your time trying to see what wasn’t there. =sighs= I was so hoping for a beautiful black shimmer bangle…)

SAM_0536SAM_0537SAM_0538

The first two are the same side, just with a wait time in between them. You can see how much more vibrant the colors are when done this way, but also how much more they bleed into one another through the groves O.O  The back is just a fun piece I did, testing out the splatter technique I see everyone doing on glass. Surprisingly it does work, but the colors are rather muddy.

SAM_0539SAM_0540

These last two photos are, believe it or not, taken just two hours after the first three. What happened? I was rubbing the pieces back and forth in my hands. Apparently without some sort of sealant the colors will rub away except in the deepest spots. Such as the groves of the piece on the left. However, I do like how the edges (?) are shown with the wearing away  on the right.


So, that is my tests on alcohol inks, and how they work when applied to polymer clay. I’ll be back with more soon enough. ^^

Ideas? Comments? Questions? Comment below Open-mouthed smile 

Friday, February 28, 2014

11 Easy Steps for Conditioning Clay

 
11stepstoconditionpolymerclay
Hey look! It's a new experiment!
Since Glass Eternal is as much about cataloging my mistakes and learning from them as it is writing about inspiration and geeky things, I'm putting up what I learned this week about conditioning clay. I've even got pictures!
Things you'll need.
  • Polymer clay that's all crumbly 
  • Some type of cutting tool (I'm using one of my old X-acto blades) 
  • freezer paper
  • baby/mineral oil 
  • tape 
  • patience
I'm warning you now, it's MESSY. I suggest taking off all jewelry on your hands and wrists prior to working with the clay. Also, just to clear it up, I was using two packages of white clay. That's why the mountain is so huge.
1. Alrighty. First up, prep your work station by taping down a piece of freezer paper, slick side up.
          SAM_0519
2. Next, take your clay and chop it up. Chop Chop Chop!
          SAM_0520
Ohh, doesn't it look lovely? Not.               
3. Now, add a FEW drops all over. Seriously, I'm talking ten drops. Max.
          SAM_0521
4. Take a little bit and start squishing it together. Fair warning. IT"S MESSY!
Really, really, really messy ladies and gents.
          SAM_0522
5. If your clay is not sticking together add one drop at a time to it, until it does.
it;s going to be all bumpy and ugly at this point. It's ok.
Now, roll it together between your hands. Round and round and round.
          SAM_0523
Does it look all smooth and pretty? Yes? Don't be fooled.
6. Smoosh it between your hands, or your fingers, or roll one fist against your palm. Whatever it takes to make it flat, I just don't suggest a pasta machine or a rolling pin at this point.
          SAM_0524
7. Fold it in half,
          SAM_0525
8. and in half again.
          SAM_0526
9. Roll it up into a ball till the outside and smooth again.
10. Now after doing this once or twice, your ball should start to feel VERY sticky. It's alright. Don't freak, (I did at first XD) it's the plasticizer in the clay activating.
         
11. You'll keep squishing and rolling the clay until it looks like this
     SAM_0527
At this point you should be able to easily pull, twist and roll out the clay. If so, you're done!
     SAM_0528
Congrats! If not, keep folding and rolling a little bit longer.
Go back to step 4 and repeat for the rest of the clay.
It takes about a half hour to an hour, depending on how much clay you're working with, but it's messy and fun.