Friday, March 28, 2014

Cast in Shadow Part II

CiS II
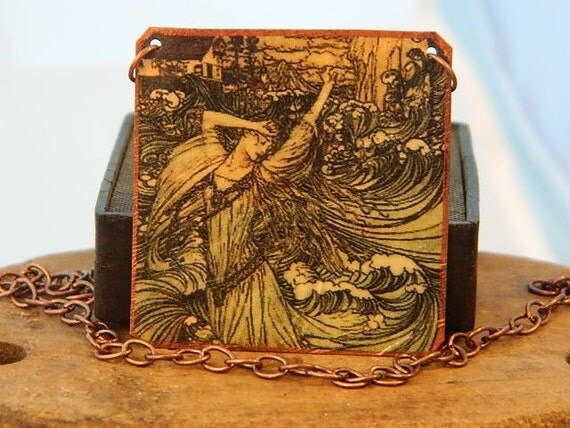
Lord Evarrim- Kaylin meets the Barrani Arcanist Lord Evarrim for the first time on pg 216, and she mistakes him for Lord Nightshade at first. Oops! She talks briefly of the slender platinum tiara he wears and how it looks like its caught in sunlight. She also talks about the red robes edged in emerald that he wears. Personally, I cannot imagine mixing red and green, except when you're talking Christmas designs, but that's me. While I hope the ruby turned out well, I admit, I'm horrid at coloring platinum at this point. I'll learn with time though. While the only thing mentioned about the tiara is that it's slender, this is what I came up with.
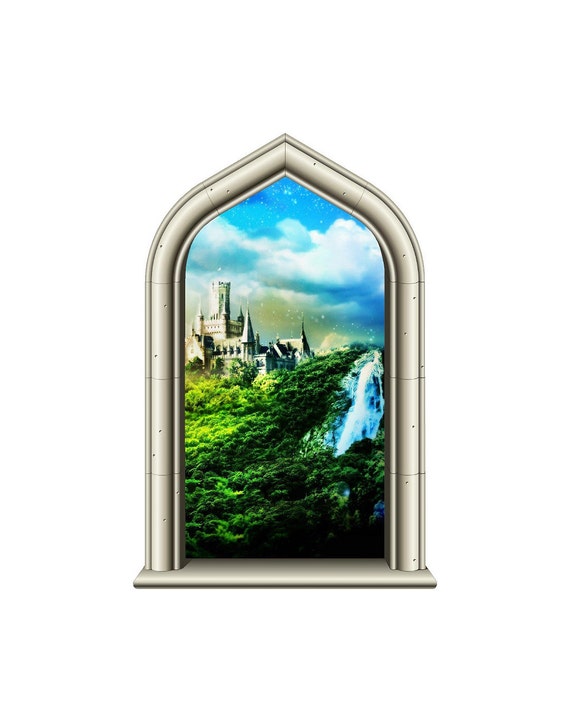
Lord Nightshade- Technically, he should've been included in last week's post, but it took me this long to come up with something for him. Kaylin first mentions how  he's wearing gold rings on several of his fingers. Thinking about Nightshade, and the fact that he's a fieflord, I figured he'd have three rings. One a plain band. Another would be a sapphire, to remind him of the secrets the Long Halls hold, not that he actually needs the reminding. The third would be his sigil. Although he gives Kaylin his mark and places it on her skin, I doubt that he does it that way for everything, hence the ring.
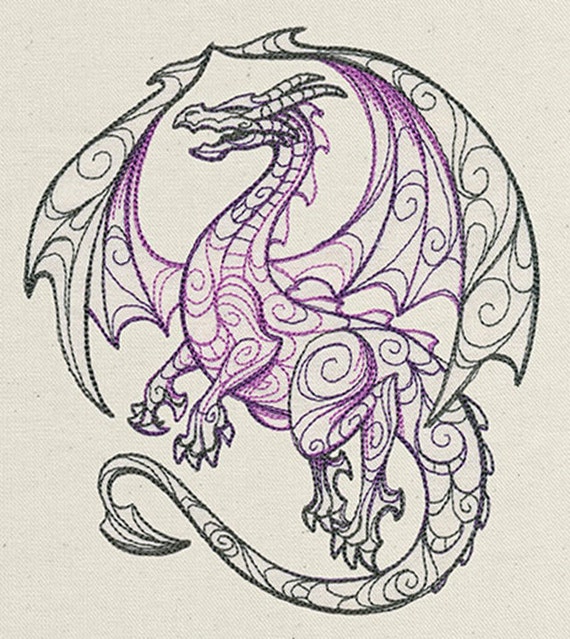
Tiamaris- I really adore Tiamaris, but there's isn't much said about what he wears. So, I came up  with this based on his Dragon form instead. Allow me to say that when I first read this, I squealed out loud. GIANT Dragon! And he's bronze. <3 Dragons make me think of dragon maille which is a particular style of chainmaille. So, Tiamaris gets to wear one of my favorite chainmaille designs, the castle pattern, done in bronze of course.

Wednesday, March 26, 2014

The Importance of Design Journals

I wanted to jabber a bit today about design journals.
I was reading an article over at Victoriatorf  and it made me think. The article expresses 15 reasons why keeping a daily visual journal is important.
I think this is actually a good idea, although I  admit it isn't one I've put into practice just yet, I'm a little groggy when I first wake up in the mornings.

I think the same concept though, of always keeping a journal handy can be applied across many fields. I know several authors who swear by the idea. I've also got a graphic artist friend who won't go anywhere without a moleskin in her pocket.

For me, I keep mine with me whenever I'm working. I only draw designs into it though, or bits and pieces of things that I think could evolve into a design. I've got some pages filled with words, and others have them scribbled around designs, twisting and curving. I also keep a digital design book, for when I want to work in color. I admit, I'm really bad at working in anything other than pencil or watercolor for traditional styles.

I've still got a lot to learn, but this seems to be one thing that is true for everyone, keep a journal of some type!

What do you think? Do you keep a journal? Feel free to comment below!

Tuesday, March 25, 2014

Treasury Post: Fairy Tales Around the World


3142
Doing something a little different for the second treasury post of the month. On writing this, it is the 17th of March, or St. Patrick's Day. For most people this brings to mind leprechauns. Between the resurgence of 'The Disney Princesses' and the show Once Upon A Time, fairy tales are very popular right now. I wanted to do something slightly different,  fairy tales from around the world. Not just your typical Grimms, but others as well.  I have to say, it wasn't hard to find a plethora of ideas and things to include. My issue was narrowing down the list.
This post has a little bit of everything, not just focusing on jewelry but on anything that was made with a fairy tale in mind. Many of these are illustrations used various interesting ways.


First up by CalliopesWork, a pendant with one of my favorite tales as a child, The Gold Ball and the Frog Prince.

Next up by DebiCreations, a stunning pattern for beaded cross stitch. I had to reread the listing when I saw that, it looks like an illustration! This one is instead about the Frog Princess, which is actually quite different from the Frog Prince.

A gorgeous Chinese lantern box by stephaniedworkshop.  She’s given new life to a severely damaged copy of the Arabian Nights.

This gorgeous chess set is made by WinkingBlindBats. Seriously, how cool is that name? And the craftsmanship of the pieces! O.O I swear, one day I’ll own one of their sets. (Although their Alice in Wonderland set has stolen my heart..)

Our next story takes us to Russia and ShanasWoodlandWhimsy’s shop, to find this cute Baba Yaga hut. While the hut does not go running around your yard, it certainly looks like it could doesn’t it?

This set of vintage bookmarks comes from the shop of Raidersofthelostart. I love the Beast one the most.

From the shop of mysunshinevintage, we get a two sided vintage print featuring the Little Mermaid, and The Emperor’s New Clothes.

This cute print comes from Longfellowdesigns. Who doesn’t want to live happily ever after?

From MoonGardenDesigns a lovely antique mermaid necklace.

Up next, a decidedly creepy and lovely print from shawnaerback. The Cheshire in the Moon is very nice touch in my opinion.

This adorably creepy leprechaun out fit is from HenryStMartin. Sadly the zombie is not part of the listing as I had originally though, but she does sell them separately so you could have your own zombie leprechaun! Open-mouthed smile 


We’re heading over to Japan with this lovely print from LaPetiteMascarade. I love the ethereal quality to the piece.

From SarahWoodJewelry a beautiful necklace depicting Arthur Rackham’s illustration of a Selkie.

From 13crowns is actually the item that spawned the idea for this post. A collection of creepy cool nekomimi stickers.  Of all the different ones I”ve seen, I’d have to say I love the kity with the candles on it’s head and the Egyptian kitty the most.

I love this next one from StickitGraphix.

And last but not least, what type of fairy tale list would it be if I didn’t include a dragon? Luckily ValentineEmbroidery has created a lovely one for fleece blankets.
That’s this month’s second treasury post ladies and gents! Feel free to comment below or click on the pictures to go check out the various shops Open-mouthed smile 


Friday, March 21, 2014

Cast in Shadow- Part 1


CiShadow

I had promised this to ya’ll last week, sadly little things got in the way. Like the book having gone missing and the local library having the book out until today.

I’m only halfway through, so one of two things is going to happen. Option a) I’m going to find something else I want to draw/ add jewelry to and next week there’s going to be a “Cast in Shadow- Part II”.

Option b) I’m not going to find anything else I want to add or draw, and then we’ll move on to the next book in the series which is Cast in Courtlight. That one is guaranteed to have tons of jewelry in it. For reasons you will see later Open-mouthed smile 

As for the two pieces you see above, allow me to explain.

On the right, you have Kaylin Neya’s bracer, which contains and protects her. Next to it you’ve got the opening sequence, which she has to use to put it on, and does so with great reluctance.

Then next to that is a necklace I designed… sort of to go with it?

On page 87(ish) Kaylin finds herself in gown, much to her chagrin. I won’t explain beyond that, in the event that you choose to go read the book (which I highly suggest. Go, shoo, I’ll still be here when you’re done reading it.) Anyway, while she was in the dress, I wondered what type of jewelry would go with it. I decided to create a necklace, rather than another bracelet, to balance her a bit, and hopefully to draw attention away from the bracer….While that is admittedly unlikely, it’s still worth a shot. Please bear in mind, this is my first attempt at color illustration of jewels, I’ll get better with time Open-mouthed smile 

Like the designs? Curious about the book? Enjoy the book and want to talk about it? Comment below! Open-mouthed smile 

See ya’ll next week!

Thursday, March 20, 2014

Pssst! Spring is Here!


SpringTut


Hullo ladies and gents. Guess what today is? The first day of spring! I don't know about anyone else, but I am soooooo ready to put away my winter coat.

I want flowers and green things, and NO MORE SNOW! 

Since I can't exactly request that Mother Nature hurry, I'll do what I can, which is, bringing you a post full of spring themed tutorials! :D

First up, wired flowers, done in the Victorian/French style.

Next up, earrings, you could whip these up in 5 minutes and head out the door to enjoy the sun shine.

Now to go with the earrings, you need a necklace.

or

or

daisy-chain-final

A daisy chain :D

What about some hair pieces?

http://jewelry-crafts.wonderhowto.com/how-to/make-delicate-beaded-hair-vine-for-weddings-375730/

What about if you like clay? Here you go, a basic how to on creating  flower cane.

Butterfly canes?

Flowers aren't the only thing coming out at this time, so what about something different? Birds!

Bird nest jewelry? TBH, I've never heard of it, but it sounds sort of fun.
http://voices.yahoo.com/unique-tips-tricks-steps-making-bird-nest-jewelry-11183060.html?cat=11 
No picture was provided for the one above, so I found  a video as well. Smile 

And to top everything off, Pantone's 'Colors of the Year'

They all look like very springy colors to me this year.
Have a good day everyone, and have fun. I am off to make some beaded flowers. :D

Comment below.


P.S.  Sorry for the lack of posts this week ya’ll. It’s been a very busy week, running hither and yon.

Wednesday, March 19, 2014

Mokume Gane- My way.

So I don't know if you've noticed, but the metalsmithing technique of mokume gane (literally 'wood eye metal' or 'wood grain metal') is popping up all over the place as a polymer clay technique. Once again, Pinterest is completely to blame for showing me this. 

First, some quick pieces that made me drool and started the itch to make things.


Looking at all of these, I think the biggest thing that makes them appeal to me is vibrant colors and contrast. I've seen plenty that should in theory work, the color palette looks nice on it's own. For some reason though, the resulting slices just never look nice?

In the event that you're now as interested as I am and want to try out making something like this, I'll give you a step by step.

1) Pick out your clay. I wouldn't choose more than 3 colors personally. Pick ones with a lot of contrast between them.

2) Roll each of these out to an equal thickness. If you have a pasta machine, I'd set it to medium , whatever that may be. (I rolled mine out to about 1/8" each at first.

3) Slice each of these layers into squares/rectangles. Now, layer those squares A, B, C.

4) Run over the top lightly with a brayer (or if you're me a copper pipe), until the layers are just stuck together.

5) Slice the entire thing in half widthwise. Lay one half on top of the other. Your pattern should go ABC ABC.

6) Repeat this once more. From what I've seen and what poking around I've been able to do, if you have more than 24 layers (give or take) you don't seem to get as much definition between the individual colors.

7) Now, grab a few things from around your workbench. Me, I've got a pen, a screw, a knife, and a wavy bit of heavy gauge wire. Stab the top of your stack! Stab it a lot ! :D

8) Now that you're done taking out pent up frustration on the block, set aside your tools, and squish the block back together, so it roughly resembles a rectangle/square again.

9) Take a floor stripper, tissue blade or x-acto knife and begin to cut away slices from the top, and set them aside. I used an x-acto and got lots of small, thin slices. If you're looking for a more solid slice, I'd go with a larger blade, a la the floor stripper or tissue blade.

10) Take your slices and turn them into jewelry or house decor, have fun!

At some point, I'll be taking pictures of my first set of finished pendants and plunking them in here for ya'll to see.  I hope you enjoyed this post, and the technique!

Feel free to comment below :D

Thursday, March 13, 2014

A New Way to Shop

Just a quick post today ladies and gents, I am so busy  running around today, I think my fingers might fall off.

So, for this month's first treasury I had chosen to go with a green theme (yay St. Patrick's Day) and I couldn't find the best way to go searching for things. Just as many posts with recycled materials came up when searching the word 'green' as did the color. I was weary and saddened, thinking I'd have to give up this treasury idea, until I found a lovely little tool Etsy put together. Shopping by Color.

O.O My mind was blown. It's beautiful! It's lovely! And it's fun!  I could just sit on the color chooser page running my mouse back and forth for ages playing with it. XD So if you're looking for something, and don't know anything beyond what color you want, or just want to have a little fun, I suggest going over and checking it out. It's on the left-hand side, Ways to Shop> Color.

My only complaint about this is that there doesn't seem to be a way to shop specific things by color. You get a random grab bag from all over the site.

Enjoy and have a good day everyone! I'll see you again soon. Open-mouthed smile

Wednesday, March 12, 2014

Alcohol Ink & Polymer Clay- A Guide-


Alcohol Ink Guide

As I mentioned last week, when I was recounting the perils of polymer clay, I originally started looking at polymer clay specifically for working with alcohol inks. I was first astounded by the lovely Veronika Sturdy over on Flickr with her work. It’s detailed and colorful and leaves me wanting to make LOTS of stuff!

And so I went hunting, to see if I could find out a) How to make my own alcohol ink and b) how to make something so vibrant and beautiful.

The first part was easy enough to find, over at Crafting a Green World, I read the tut, and quickly ran around my home looking for a bag of markers I’d stashed. Et voila! 30 mins later, I had a bunch of alcohol inks. But…. How do you use them?

Well, I found two lovely tutorials.

The first lets you make something like this

Except… you have to have liquid polymer clay. Which I don’t have access to for the time being… Hrm. Back to the internet. Which led to the second one.

A very lovely tut, easy simple to follow, and best of all, only two things were required, and I had both! Polymer clay and alcohol ink. Open-mouthed smile 

But… It’s not quite as vibrant as the lovely ones that Veronika Sturdy attains…
So I decided to  do tests first.  I had to make sure that it would work.  And that is what this post comes from. My tests of alcohol ink vs polymer clay.

First up, we have Alcohol Ink, painted directly to UNCURED clay.

SAM_0529SAM_0531

I used the same technique for both the white and the black pieces. Just a simple stripe of the different colors, going around the piece. I tried to make sure they didn’t bleed, but wasn’t 100% successful.

SAM_0532ISAM_0533

The row below is the pieces after they were baked. The colors of the inks became a little bit lighter, but not by much. The black has an iridescent look to it, which is hard to see unless you get the angle just right, and even harder to capture on camera.

SAM_0534SAM_0535

These next three photos are tests of CURED clay that was then painted. (The black ink didn’t change a bit, and I decided not to waste your time trying to see what wasn’t there. =sighs= I was so hoping for a beautiful black shimmer bangle…)

SAM_0536SAM_0537SAM_0538

The first two are the same side, just with a wait time in between them. You can see how much more vibrant the colors are when done this way, but also how much more they bleed into one another through the groves O.O  The back is just a fun piece I did, testing out the splatter technique I see everyone doing on glass. Surprisingly it does work, but the colors are rather muddy.

SAM_0539SAM_0540

These last two photos are, believe it or not, taken just two hours after the first three. What happened? I was rubbing the pieces back and forth in my hands. Apparently without some sort of sealant the colors will rub away except in the deepest spots. Such as the groves of the piece on the left. However, I do like how the edges (?) are shown with the wearing away  on the right.


So, that is my tests on alcohol inks, and how they work when applied to polymer clay. I’ll be back with more soon enough. ^^

Ideas? Comments? Questions? Comment below Open-mouthed smile